5 Steps to Kūmara Success
- Choose a sunny spot with plenty of space.
- Prepare the soil well with sheep pellets and compost.
- Add a layer of vegetable mix to plant into. October is a good time to plant in New Zealand and when shoots are available to buy.
- Apply vegetable food regularly during key growth times of spring and summer.
- Lift the foliage regularly for increased tuber growth.
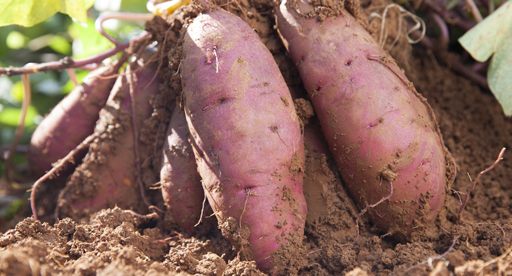
Also known as sweet potato, kūmara is a firm Kiwi favourite. High in fibre and providing essential nutrients including calcium and iron, it is a superfood of the garden. Kūmara is a root crop that grows underground in a similar way to potatoes. Follow our step by step guide.
Prepare
Kūmara is a frost-tender crop that prefers a warmer climate and needs a hot summer, so it can be a challenge to grow in cooler areas of New Zealand. Ideally kūmara enjoys a soil which is well cultivated to a depth of approximately 30cm, then has a hard pan underneath to stop the tubers from burying themselves too deeply.
Prepare the area well in advance of planting. Plant the tubers in full sun, in a rich, fertile, warm soil. If you are starting with an existing garden bed dig in organic matter like Tui Sheep Pellets and Tui Compost to your soil. Then you can add a layer of Tui Vegetable Mix.
Kūmara also need plenty of room to grow, as they produce vine like green growth.
Kūmara shoots are available in garden centres in spring, usually around October. If you'd like to propagate a cutting, simply cut a mature kūmara root in half and place cut side down in a saucer of water. Within a week or two, green shoots will appear. Once these are 10-15cm long, they can be removed from the kūmara and placed in water to root. Insert most of the cutting into the ground, bending the bottom where the roots are into a 'J' shape - this encourages the roots to travel horizontally along the soil and not bury themselves too deep. Plant out cuttings as soon as the threat of frosts have passed.
Plant
Planting in garden beds
- Dig a hole.
- Position the kūmara shoot in the centre of the hole.
- Fill in with Tui Vegetable Mix.
- Water well after planting.
Nourish
Feed your plants and they will feed you. Kūmara use nutrients from the soil as they grow, so replenishing nutrients regularly ensures your plants grow to their full potential. Select a fertiliser specially blended for your crop like Tui Vegetable Food.
Well watered, well nourished kūmara will have a better chance of keeping insect pests and diseases at bay. While your kūmara are growing regularly apply a dose of Tui Organic Seaweed Plant Tonic to give them a welcome boost.
Lift the foliage regularly. As the vines grow the stems naturally put down new roots where they touch the soil. If you lift the foliage this means the plant will put more energy in tuber growth rather than leaf growth.
Harvest
Kūmara take approximately 120-150 days from planting to harvest. Harvest once the leaves start to yellow (usually in autumn if planted in spring). Cut back the foliage and then lift kumara carefully using a fork. Leave them on the bed to cure in the sun for a couple of days. Cover them at night (with a sack or newspaper). Then store in a cool dry place.
- Jan
- Feb
- Mar
- Apr
- May
- Jun
- Jul
- Aug
- Sep
- Oct
- Nov
- Dec
- Harvest in 120-150 days